1. 接入阿里云短信服务
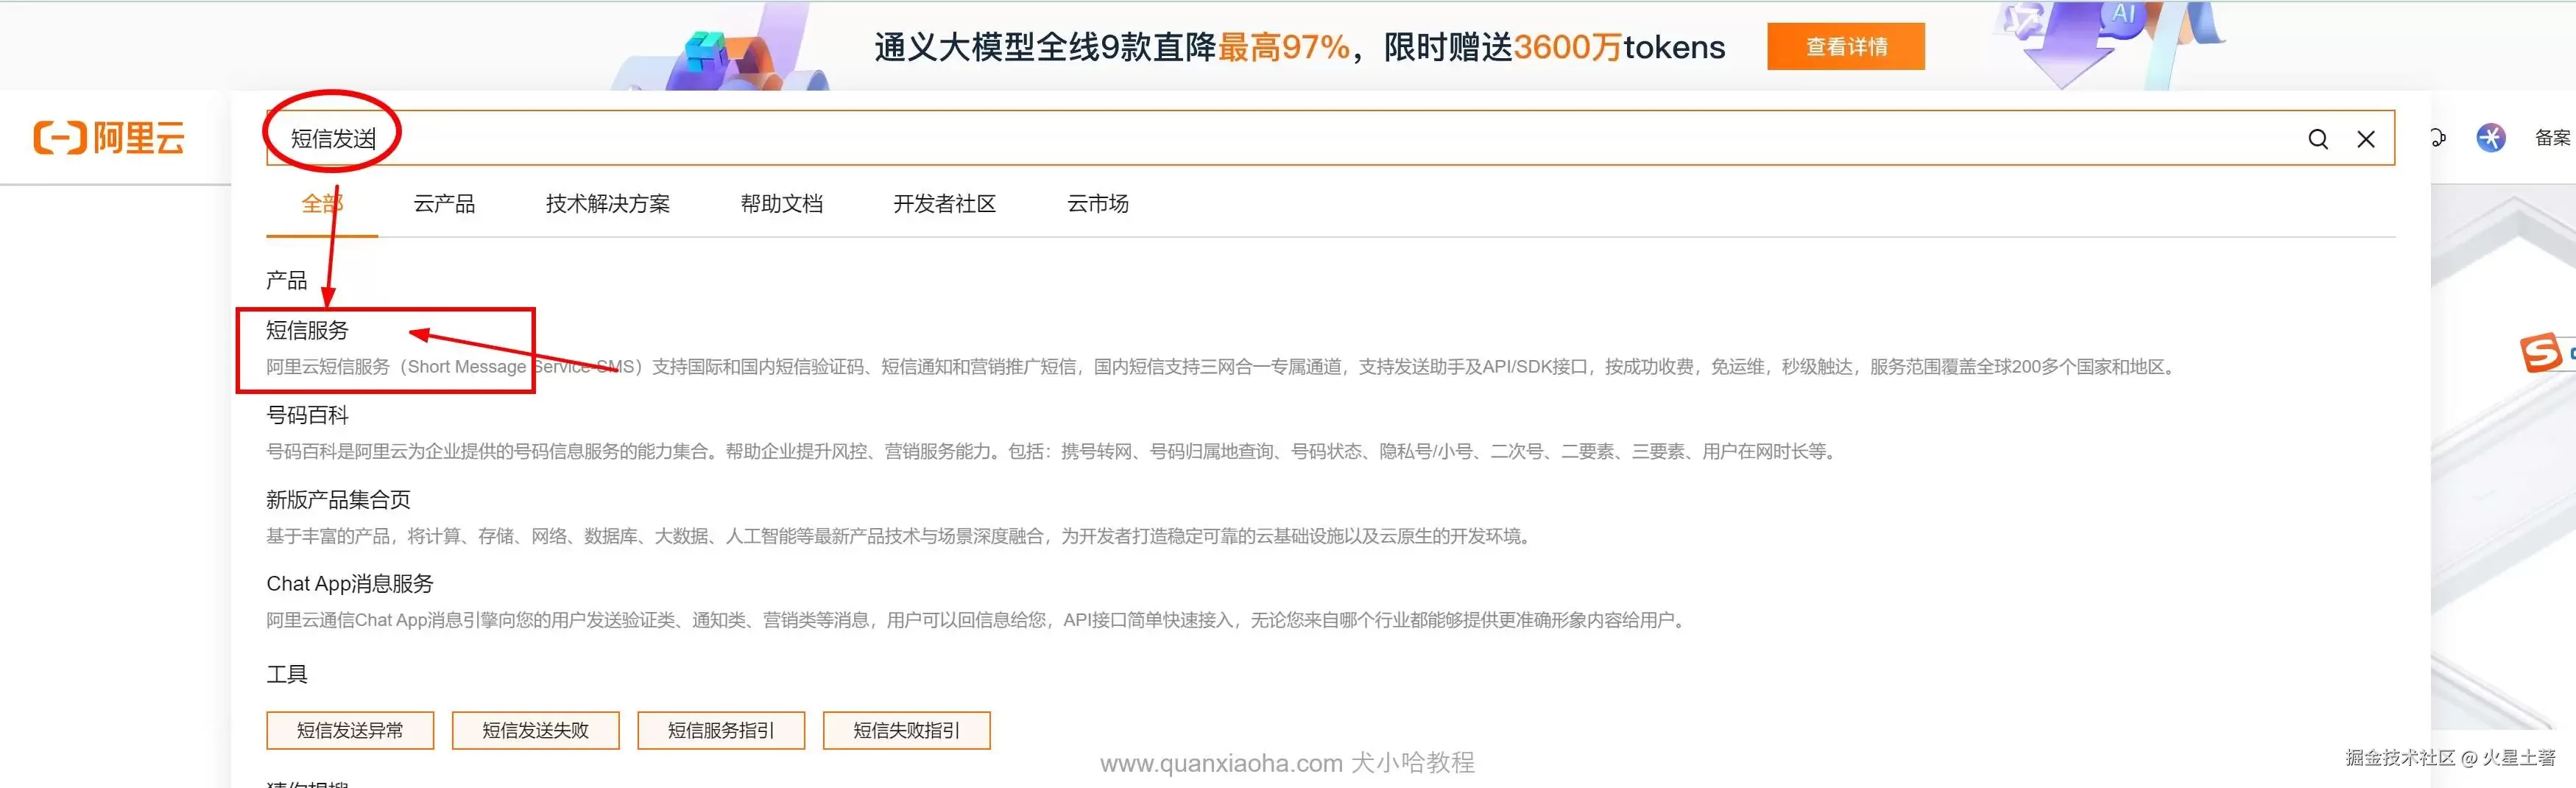
登录阿里云服务器官网,然后点击搜索输入短信服务,点击免费开通

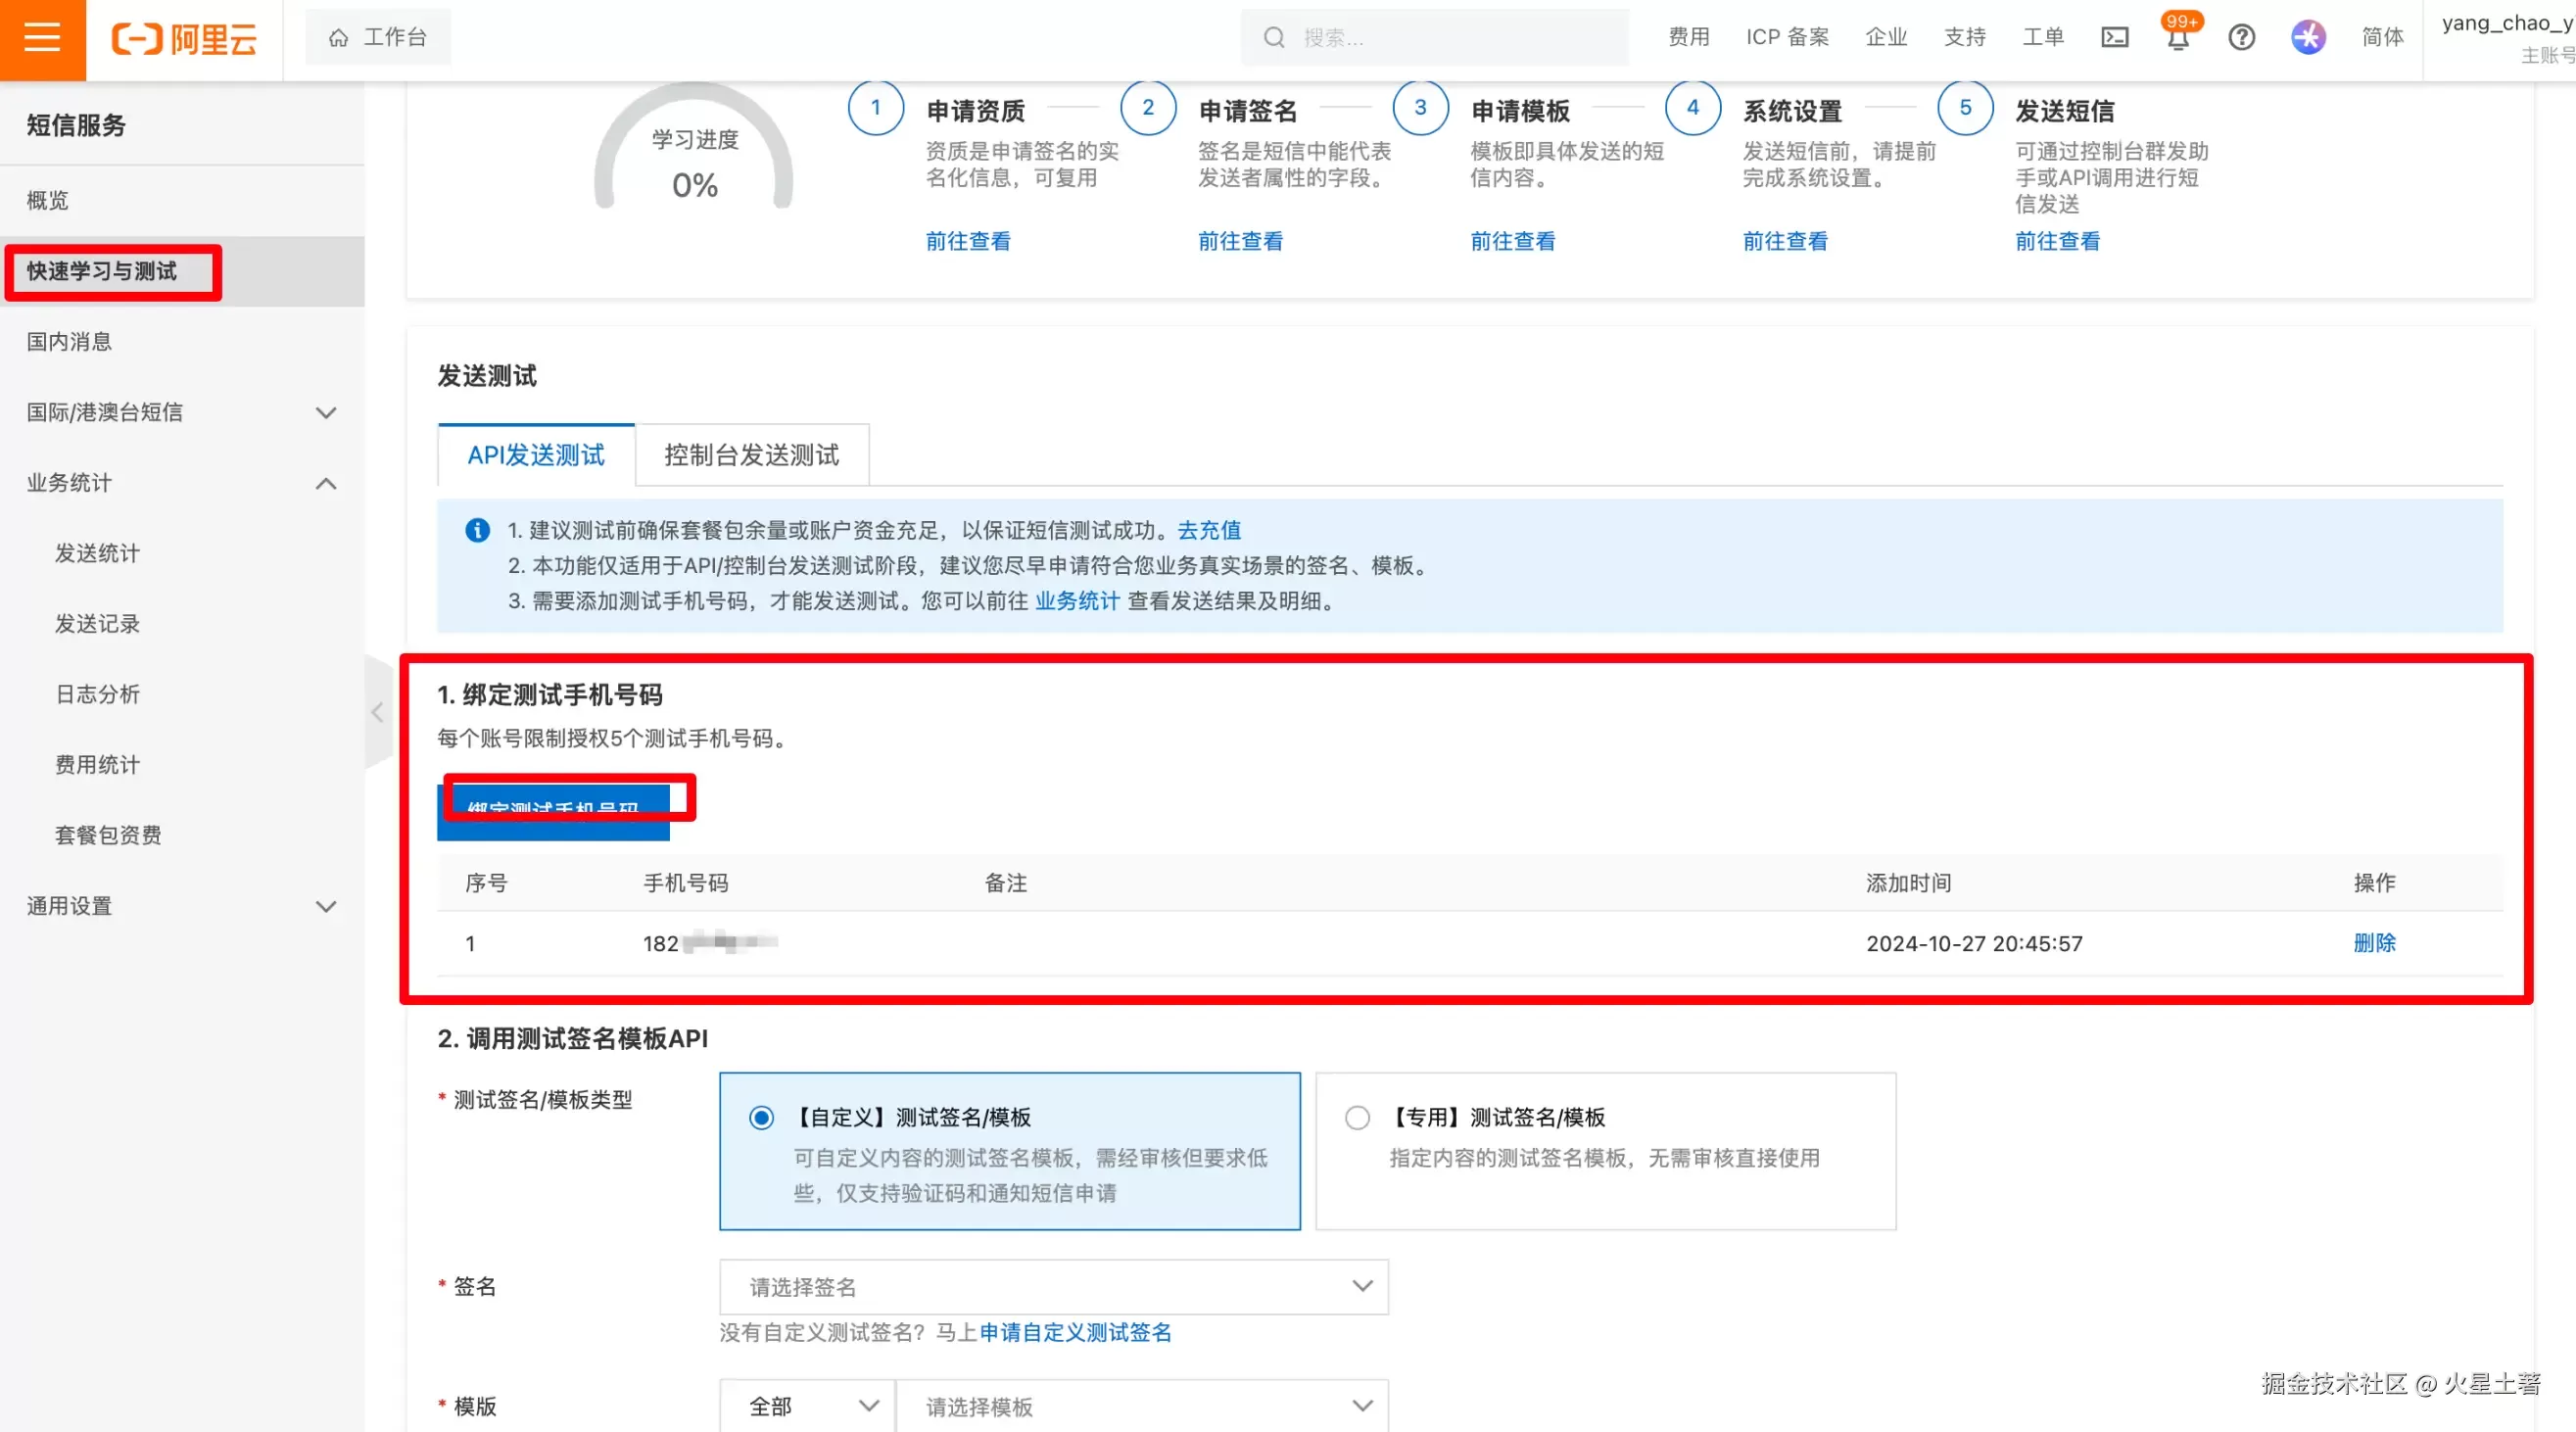
点击快速学习与测试
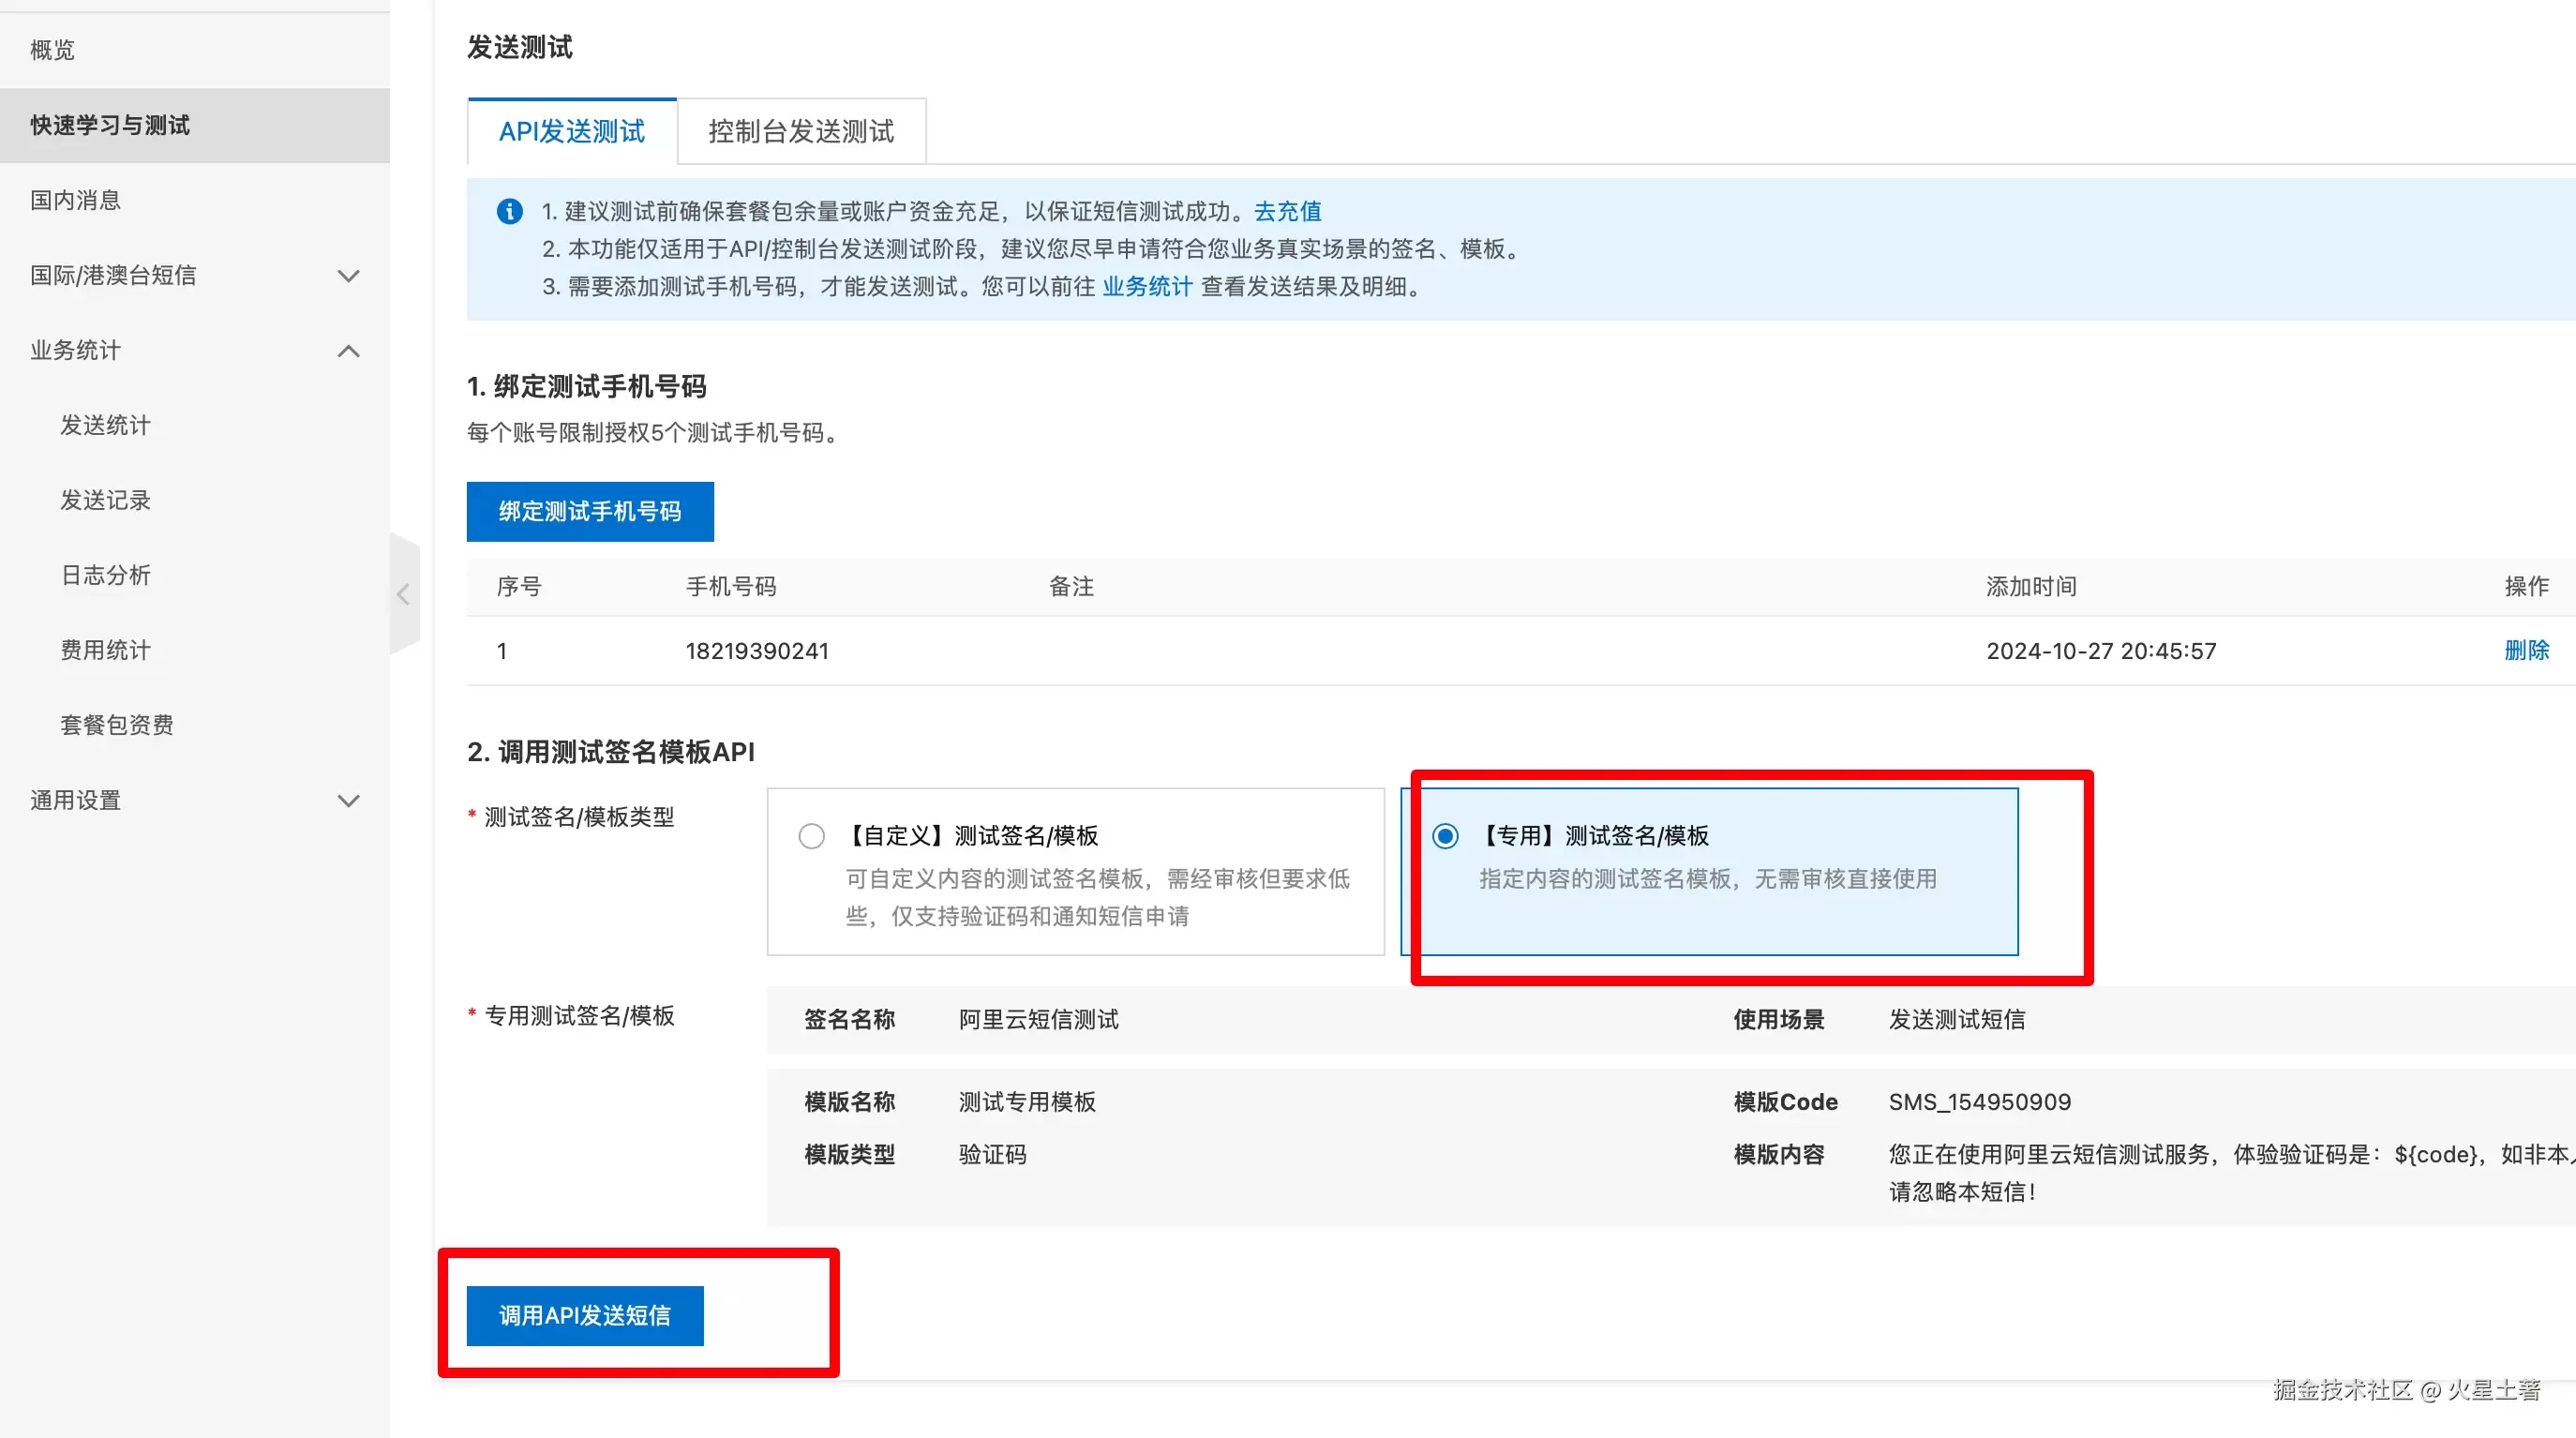
测试用的所以点击专用测试签名模板,并点击调用 API 测试
2. 添加阿里云 SDK
然后进入到另一个页面后,点击 SDK 详情,这里使用的是 SpringBoot,所以点击 java 实例
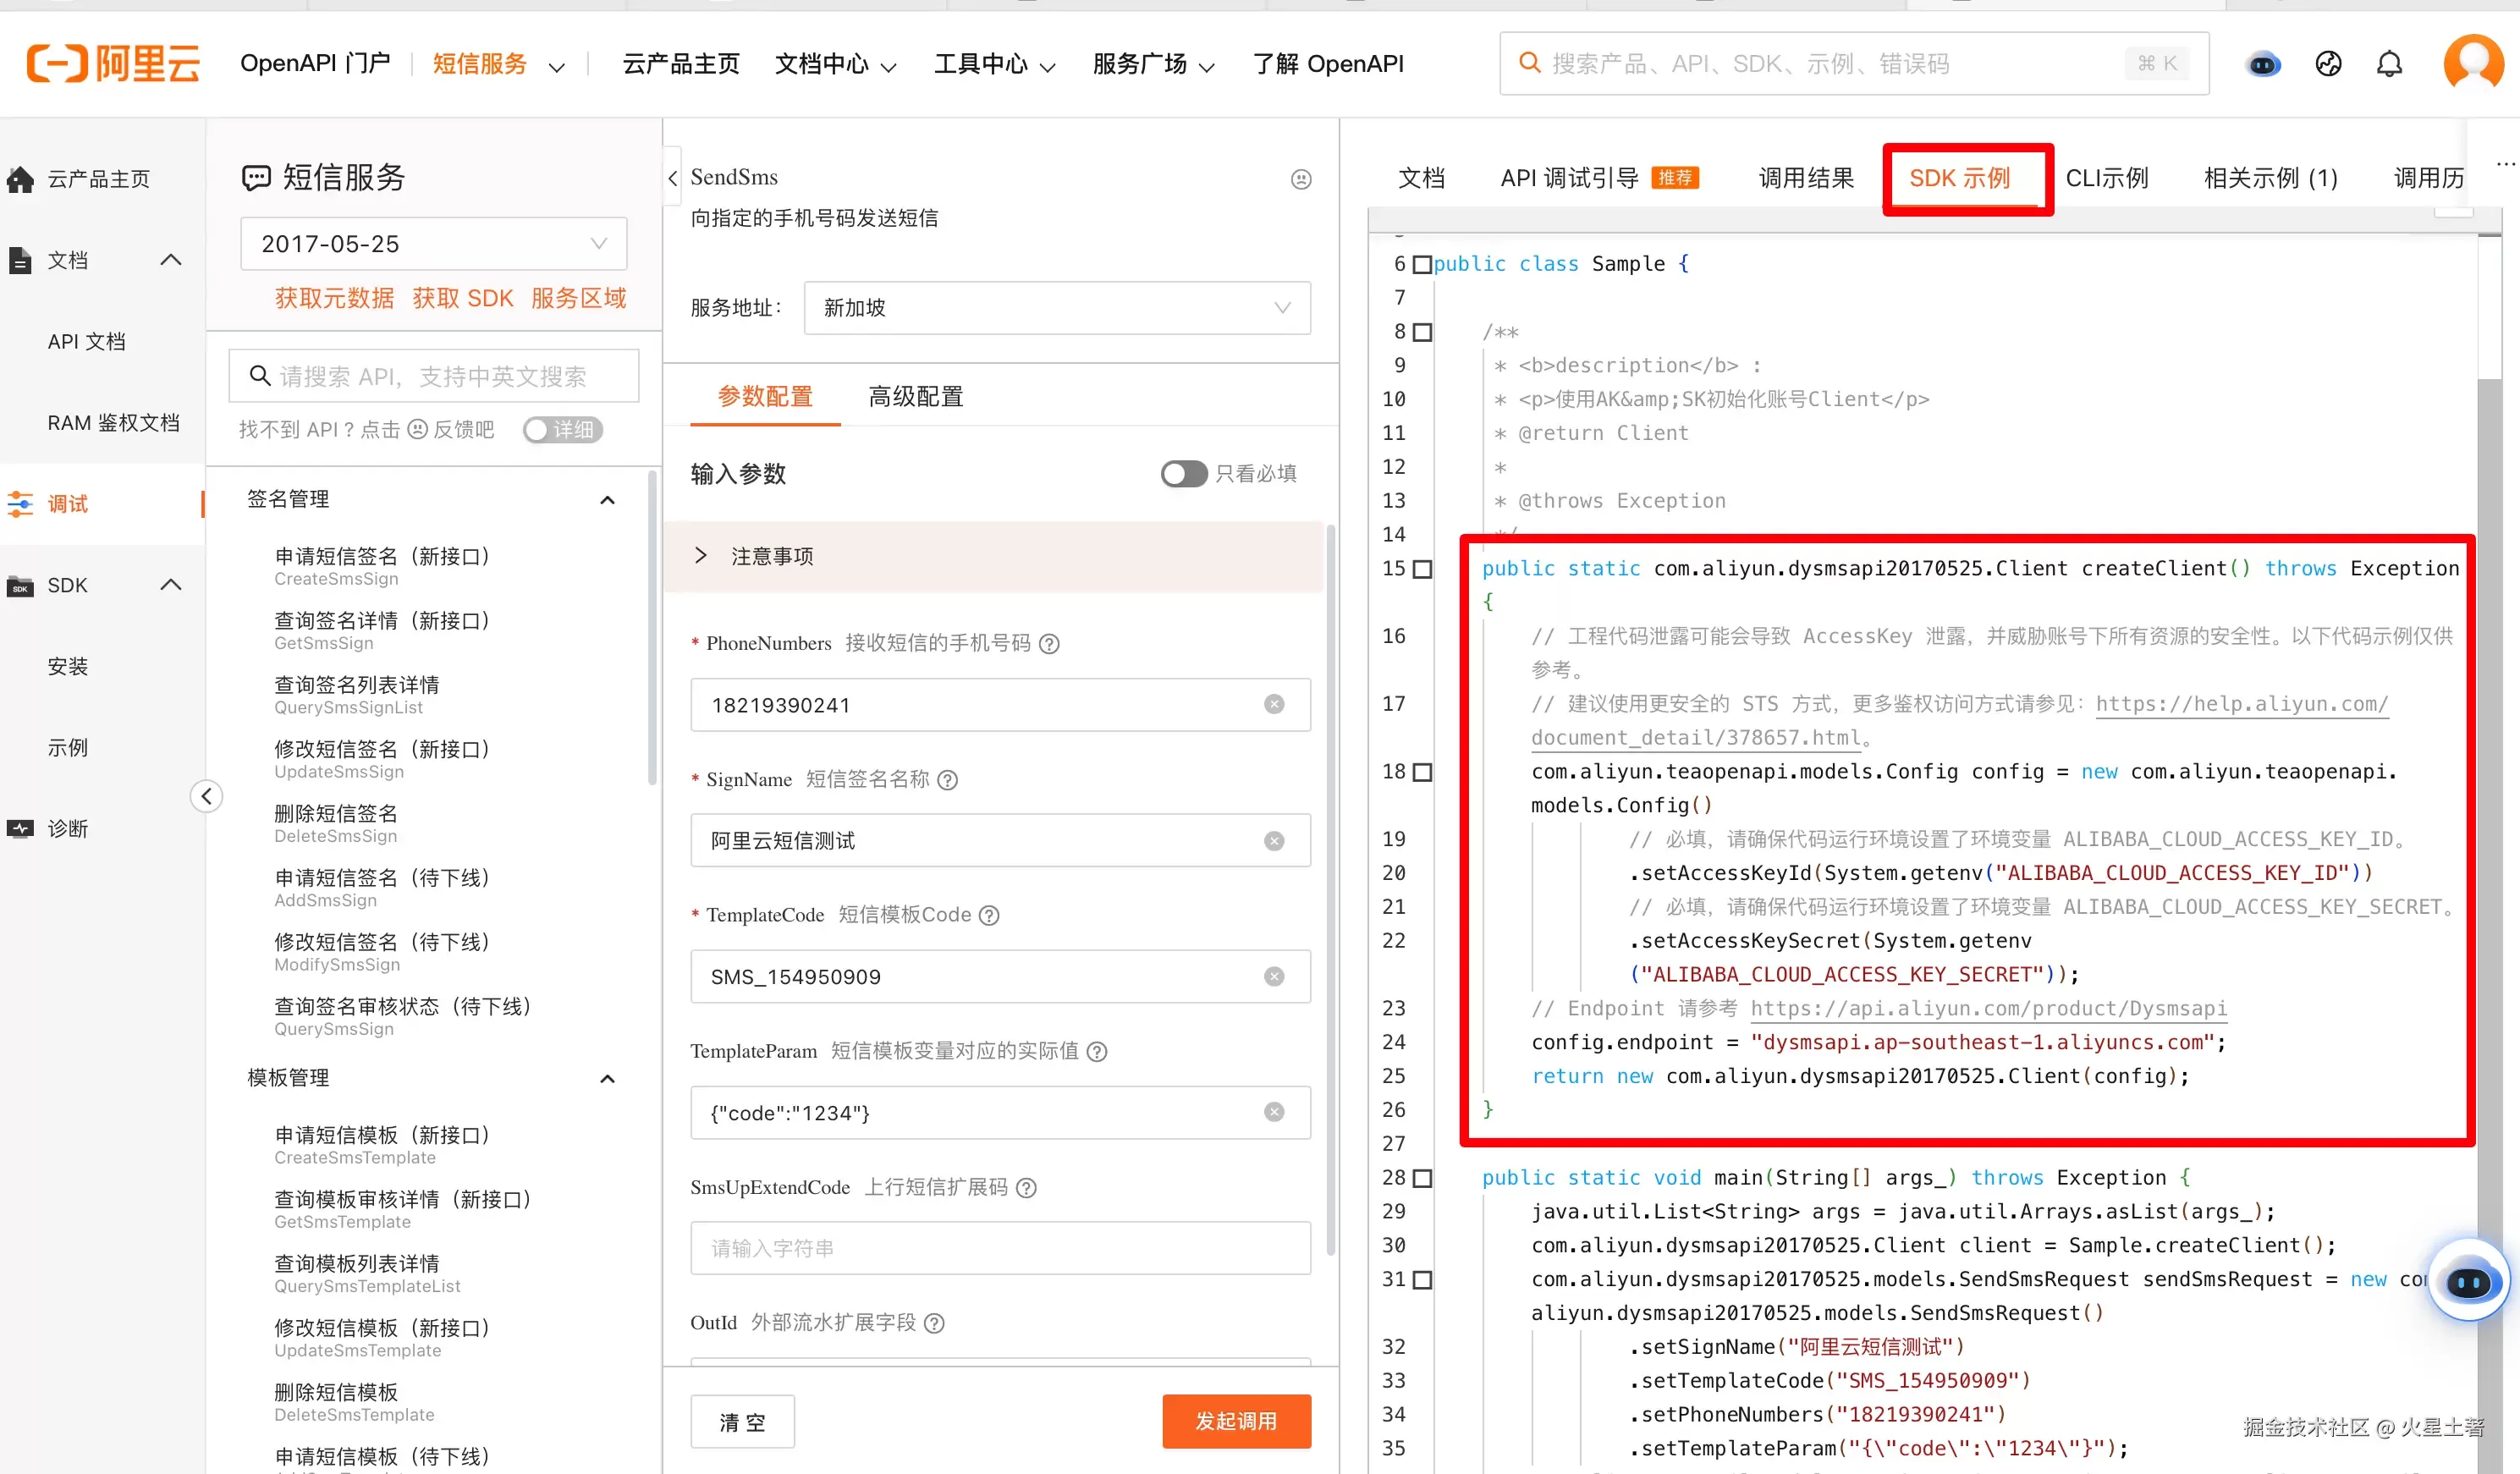
在旁边有个 SDK,点击进去,就可以看到你们的 maven 情况,然后把这个 maven 依赖引入到 SpringBoot 项目中的 pom.xml 文件中

// 省略...

<dependencies>
  // 省略...

  <!-- 阿里云短信发送 -->
  <dependency>
    <groupId>com.aliyun</groupId>
    <artifactId>dysmsapi20170525</artifactId>
  </dependency>
</dependencies>

// 省略...
3. 添加 AccessKey
查看发送短信的示例代码,你会发现需要填写阿里云的 Access Key,它是接入凭证。点击回到阿里云首页,将鼠标移动到登录用户的头像上,即可看到 AccessKey 选项,点击即可查看:

记得给你的账号充值一点钱,比如 1 块钱,因为等会发送测试短信需要费用。
然后编辑你的 application.yml文件,把这些 accesskey填写进去
aliyun:# 接入阿里云(发送短信使用)
  accessKeyId:xxx# 填写你自己的
  accessKeySecret:xxx# 填写你自己的
写个配置类来读取yml中的配置信息,AliyunAccessKeyProperties 配置类
@ConfigurationProperties(prefix = "aliyun")
@Component
@Data
public class AliyunAccessKeyProperties {
    private String accessKeyId;
    private String accessKeySecret;
}
然后,新建 AliyunSmsClientConfig 配置类,用于初始化一个短信发送客户端,注入到 Spring 容器中,以便后续使用,这里对官方的实例代码进行了改造:
@Configuration
@Slf4j
public class AliyunSmsClientConfig {

    @Resource
    private AliyunAccessKeyProperties aliyunAccessKeyProperties;

    @Bean
    public Client smsClient() {
        try {
            Config config = new Config()
                    // 必填
                    .setAccessKeyId(aliyunAccessKeyProperties.getAccessKeyId())
                    // 必填
                    .setAccessKeySecret(aliyunAccessKeyProperties.getAccessKeySecret());

            // Endpoint 请参考 https://api.aliyun.com/product/Dysmsapi
            config.endpoint = "dysmsapi.aliyuncs.com";

            return new Client(config);
        } catch (Exception e) {
            log.error("初始化阿里云短信发送客户端错误: ", e);
            return null;
        }
    }
}
最后,再创建一个 AliyunSmsHelper 短信发送工具类,代码如下:
@Component
@Slf4j
public class AliyunSmsHelper {

    @Resource
    private Client client;

    /**
     * 发送短信
     * @param signName
     * @param templateCode
     * @param phone
     * @param templateParam
     * @return
     */
    public boolean sendMessage(String signName, String templateCode, String phone, String templateParam) {
        SendSmsRequest sendSmsRequest = new SendSmsRequest()
                .setSignName(signName)
                .setTemplateCode(templateCode)
                .setPhoneNumbers(phone)
                .setTemplateParam(templateParam);
        RuntimeOptions runtime = new RuntimeOptions();

        try {
            log.info("==> 开始短信发送, phone: {}, signName: {}, templateCode: {}, templateParam: {}", phone, signName, templateCode, templateParam);

            // 发送短信
            SendSmsResponse response = client.sendSmsWithOptions(sendSmsRequest, runtime);

            log.info("==> 短信发送成功, response: {}", JsonUtils.toJsonString(response));
            return true;
        } catch (Exception error) {
            log.error("==> 短信发送错误: ", error);
            return false;
        }
    }
}
4. 业务层异步发送短信
一般情况下,在用户调用发送短信接口后,在业务代码不出错的情况下都会先提示验证码已经发送成功,所以一般都会先返回信息,然后用多线程中的异步去给用户发送短信
1、多线程的自定义
@Configuration
public class ThreadPoolConfig {

    @Bean(name = "taskExecutor")
    public Executor taskExecutor() {
        ThreadPoolTaskExecutor executor = new ThreadPoolTaskExecutor();
        // 核心线程数
        executor.setCorePoolSize(10);
        // 最大线程数
        executor.setMaxPoolSize(50);
        // 队列容量
        executor.setQueueCapacity(200);
        // 线程活跃时间(秒)
        executor.setKeepAliveSeconds(30);
        // 线程名前缀
        executor.setThreadNamePrefix("AuthExecutor-");

        // 拒绝策略:由调用线程处理(一般为主线程)
        executor.setRejectedExecutionHandler(new ThreadPoolExecutor.CallerRunsPolicy());

        // 等待所有任务结束后再关闭线程池
        executor.setWaitForTasksToCompleteOnShutdown(true);
        // 设置等待时间,如果超过这个时间还没有销毁就强制销毁,以确保应用最后能够被关闭,而不是被没有完成的任务阻塞
        executor.setAwaitTerminationSeconds(60);

        executor.initialize();
        return executor;
    }
}
2、异步发送短信,这里未来自适应我的项目中的短信登录接口,所以额外加了一些逻辑判断
/**
     * 发送短信验证码
     *
     * @param sendVerificationCodeReqVO
     * @return
     */
    @Override
    public Response<?> send(SendVerificationCodeReqVO sendVerificationCodeReqVO) {
        // 手机号
        String phone = sendVerificationCodeReqVO.getPhone();

        // 构建验证码 redis key
        String key = RedisKeyConstants.buildVerificationCodeKey(phone);

        // 判断是否已发送验证码
        boolean isSent = redisTemplate.hasKey(key);
        if (isSent) {
            // 若之前发送的验证码未过期,则提示发送频繁
            throw new BizException(ResponseCodeEnum.VERIFICATION_CODE_SEND_FREQUENTLY);
        }

        // 生成 6 位随机数字验证码
        String verificationCode = RandomUtil.randomNumbers(6);

        log.info("==> 手机号: {}, 已生成验证码:【{}】", phone, verificationCode);

        // 调用第三方短信发送服务
        threadPoolTaskExecutor.submit(() -> {
            String signName = "阿里云短信测试";
            String templateCode = "SMS_154950909";
            String templateParam = String.format("{"code":"%s"}", verificationCode);
            aliyunSmsHelper.sendMessage(signName, templateCode, phone, templateParam);
        });

        // 存储验证码到 redis, 并设置过期时间为 3 分钟
        redisTemplate.opsForValue().set(key, verificationCode, 3, TimeUnit.MINUTES);

        return Response.success();
    }